|
 Configuring dial-up connection (Win 95/98)
The
following is a step-by-step procedure for configuring
your dial-up connection for internet access in Windows
95/98. Your screens may vary slightly depending on the
operating system you are currently using.
You can also automatically configure your computer for
your dial-up connection by logging into your
account, selecting the "your services"
button, choosing the service to configure, and clicking
the "configure my PC for this account" button.
1.
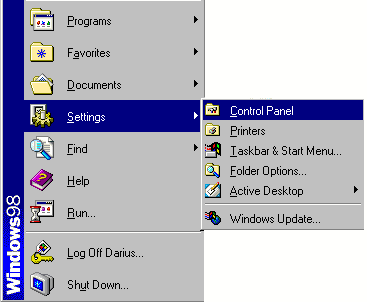
Go to your start menu and select Start > Settings
> Control Panel.

2. From the control panel, double click the Internet
Options Icon.

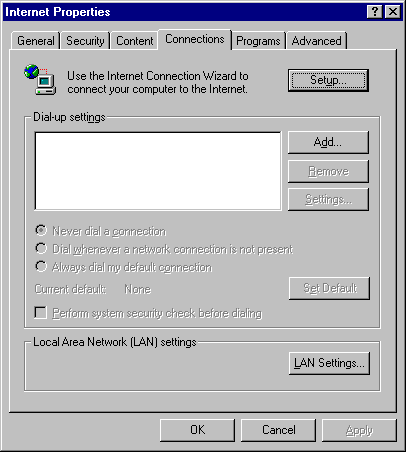
3. Select the Connections tab at the top of the window,
and then select the add button to the right.

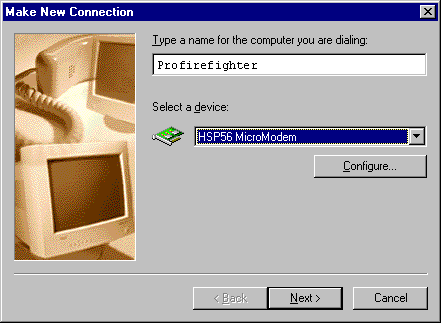
4. A wizard will start and ask you for input. First
give the connection a name. The name can be anything
you like. Then, push the "Next" button.

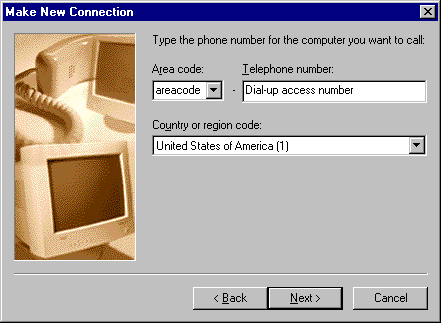
5. Enter the telephone number that you selected when
you signed up for dial-up access, and then push the
"Next" button.

6. When the next screen comes up, push the "Finish"
button.
7. A new icon under dial-up settings is created. Highlight
the icon, push the "set default" button to
the right, and put a check next to always dial my default
connection, as in the following image.

Next Page >
Setting your user name and password
|